Picto Diary - 17 June 2015 - August Allied Offensive, Gallipoli
The chain of command had broken down entirely. General Hammersley could not have taken any resolute decision even if he had wished to do so, for he did not know that Chocolate Hill had been captured until well after midnight, and the news about Green Hill never reached him till the following morning. Stopford continued in virtual isolation aboard the Jonquil all day, and G.H.Q. at Imros was even more out of touch. Hamilton, immensely relieved that the new army had got ashore, had naturally presumed that it would advance to the hills in the first light of the morning on August 7, and the second-hand news he received from Anzac and from ships returning from Suvla did, in fact, give him the impression that all was going well. It was, then, something of a shock when Stopford's first message came in at mid-day. "As you see," it said, "we have been able to advance little beyond the beach." It hardly seemed possible....
"Gallipoli," Alan Moorehead
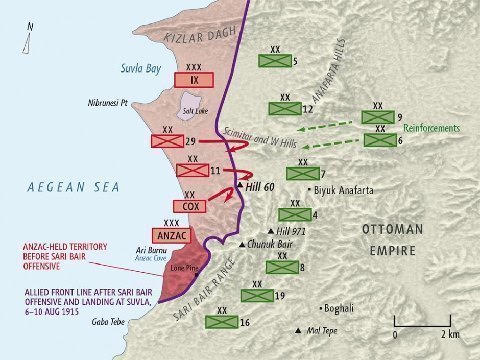
Above: Map showing Allied ground gained - and retained - against the Ottoman Empire, which was allied with the Central Powers, during the early August, 1915, Allied offensive. Gallipoli Peninsula, Turkey. Map does not show, 7 km to the east (right) Dardanelles Straits leading to Constantinople and the Black Sea, the securing of which is the ultimate objective of the Allied invasion.
The August offensive, headed by sector commander Sir Ian Hamilton, had four principal components.
1. British troops at Helles (at the tip of the Gallipoli Peninsula, not shown on map) would launch a move forward to capture high ground at Krithia.
2. The Anzacs, in position along 2nd Ridge held since late April 1915, would launch a break-out attack daytime, 06 August 2015, from Lone Pine (see map) on Turkish positions... this intended to be a serious attack, but also a diversion.
3. A Kiwi Anzac column would head north, swing east and climb the ravines of the Sari Bair range and secure positions in and around Chunuk Bair. A British column, brought up form Helles, would also head north, swing east, further up from the Kiwi column, climb the ravines of the Sari Bair range and secure positions at high ground on and around Hill 971.
4. 25,000 British troops would be landed at night at Suvla Bay. Troops would immediately secure the beach head then head southeast, to join the two pronged Anzac assault on the Sari Bair range.
The August offensive ended in failure. Intense fighting occurred throughout most of the month of August, by which time, both sides fatigued, hunkered down along trenches and lines shown in the above map.
A. The allied troops at Helles were unable to advance much further beyond lines held 06 August 1915.
B. The Lone Pine break-out - feint - attack launched by the Anzacs entailed some of the bloodiest fighting of the war. By the end of August 1915, the Anzacs had suffered 4000 casualties. The fighting spirit of the Anzacs was at fever pitch prior to the assault, with Anzac soldiers offering up to five pounds to soldiers who would exchange their front line position before the first attack. When Anzac soldiers reached the Turkish line they found the Turkish trenches covered with logs. Anzacs thrust bayonets into the logs, scrambled to remove the logs, and dove into the trenches fighting hand to hand. In the end, the Turks held the line. More Victoria Crosses were issued in Lone Pine August offensive phase of the Gallipoli fighting - six - than at any other point or place in the conflict.
C. The Kiwi column was initially successful, reaching the heights of Chunuk Bair and securing a bridgehead. British troops who replaced the worn out Kiwi's were driven back down the ravine the next day. The British column which was to make a parallel assault further east on Hill 971 failed to accomplish its objective, mainly because its forward scouts got lost. The delay gave time for the Turks to bring in reinforcements to push back the British column.
D. The Suvla Bay landing was a major failure and the proximate cause, or trigger, for the removal of Ian Hamilton as sector commander, and for Allied withdrawal from the peninsula beginning in late December 1915. The beach was secured, but the assault on Sair Bair, to compliment the two pronged Anzac assault, which was to start immediately after the landing, did not get moving for two days. At the time of the Suvla Bay landing, the ground between the beach head and the range was only lightly defended by the Turks. The two day delay in making the attack gave time for large concentrations of Turkish troops to reach Sari Bair and below. The Kiwi column "success" was short lived as expected support from the Suvla thrust was not forth coming.
Heavy fighting continued throughout the rest of August. Later in the month, Allied troops failed, after a bloody battle, to secure Hill 60 (see map). But, by the end of August troops on both sides were exhausted. Opposing forces dug in along lines shown in the above map.
Note: Errors are mine. I'm not subjecting my notes to close editorial scrutiny. My summaries - a way of driving home to myself that I understand - derive from from listening to Rod and supplementary reading along the way and are written in stream of conscious daily diary form. I think what I've written is directionally correct, but, if you're interested in this topic read an authoritative book, like Alan Moorehead's "Gallipoli." Also, corrections and clarifications are welcome.
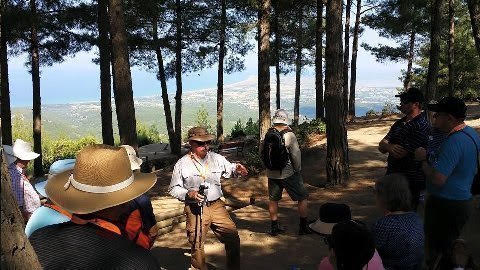
Above: Rod Margetts speaking to members of the Sapper Gallipoli Tour. Chanuk Bair (high ground allied objective). Gallipoli peninsula. Turkey. 17 June 2015.
In the distance in image, Suvla Bay, where 25,000 British troops were landed on 06 August 2015. The landing British troops were expected to support an Anzac attempt to secure Chunuk Bair and Hill 971 in the Sari Bair range, but because of poor planning and field leadership incompetence, delays provided time for Turkish reinforcements to stop their progress
Let's review.
1. Anzac invasion at Anzac Cove, 2 KM north of intended, easier landing spot at Gabe Tepe. 25 April 1915. Anzacs failed to reach high ground. ANZACs dig in along 2nd Ridge, mid way to high ground on Sari Bair Range (Chunuk Bair, Hill 971).
2. Turkish counter attack. 19 May 1915.
ANZACs hold the line spilling much Turkish blood (10,000 Turkish casualties) at Quinn's Post and Lone Pine, along 2nd Ridge.
3. New Allied offensive. 06 August 1915 - end August 1915.
Turks beat back offensive at Helles. Turks turn back Anzac attacks at Lone Pine. Turks reverse a short lived Kiwi success to occupy Chunuk Bair. A British column gets lost, and arrives late to face bolstered Turk positions at Hill 991. Incompetent leadership and planning stymies the Suvla Bay landing.
Today, the Sapper Gallipoli Centenary Tour, organized by Baronia Travel Center, Melbourne, visits sites on the Sari Bair range and at Suvla Bay allowing for study and understanding the Allied August Offensive, 1915, Gallipoli Peninsula.
Hyper competent battlefield tour director, Rod Margetts continues to impress with his knowledge of the "ground" and the battle and with his economical communication skills. We're Rod's explanations to be transcribed to print, little or no editing would be required.
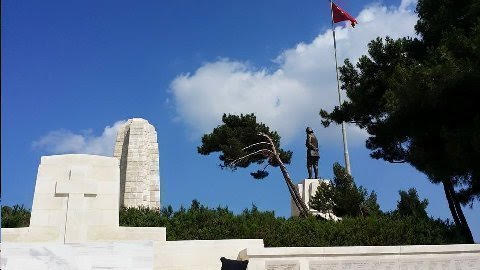
Above: Kiwi Cemetery at Chunuk Bair. Gallipoli Peninsula, 17 June 2015.
Left: Cemetery monument. Above: Kiwi national monument. Right: Ataturk statue neath Turkish flag.
The Kiwi monument is on the highest ground - Chunuk Bair - of all the many Allied monuments throughout the Gallipoli battlefield.
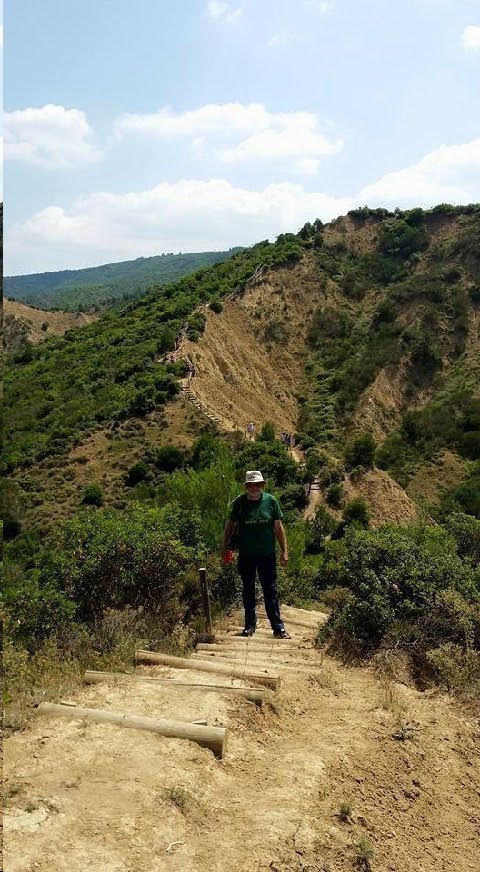
Above: Malcolm walking down Rhododendron Ridge. Gallipoli Peninsula. 17 June 2015
Kiwi infantry followed the same route, though more likely down in the ravine, in the opposite direction to reach, and hold for a short period, the high ground at Chanuk Bair on 06 August 1915. Chunuk Bair is on the ridge in the background of the image.
Other members of the Sapper Gallipoli Centenary Tour can be barely discerned in the image further up (though down in this section!) the trail.
We walked down, from Chanuk Bair (far summit in image) a couple miles, in comfortable clothing, carrying just a water bottle. That the Kiwis climbed these hills 100 years ago, in the dark, in full battle gear, often under fire, carrying 100 pound packs, seems unimaginable. Also, its August, where daytime temperatures reach 90 degrees.
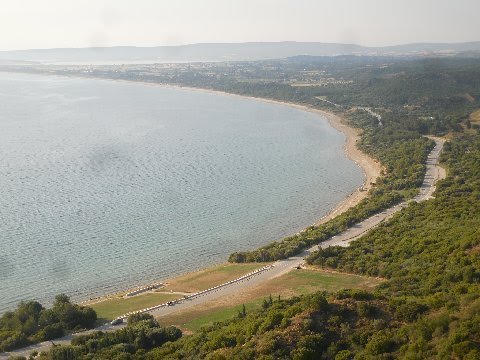
Above: Suvla Bay, barely discernable in northwest corner of image. The salt lake, below high ground at about 11:00 o'clock at left top of image. Gallipoli peninsula. Turkey. Image captured two days ago, 15 June 2015, from Plugge's Plateau.
Anzac Cemetery on beach .
Addendum:
Gather you got home safely.
Your company on the tour was most appreciated. I had a very moving experience to be actually 'on the ground' where Grandad was.
Malc,
Tokyo, Japan
Amazing trip. Moving. I very much appreciate opportunity of going. I am glad for the opportunity to have "met" Anzac Jack and his mates.
Interesting history, photos very nice-Thanks
Mr. Z3
Ojai, CA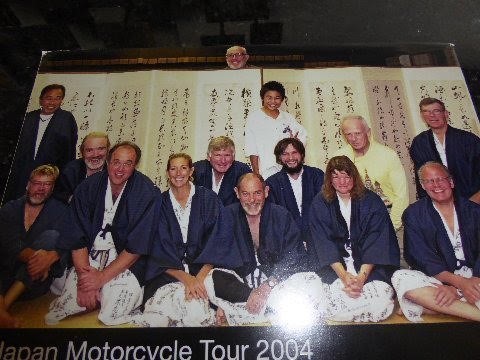
Above: Nostalgia pic. Cover image - the Lotus Crowd - for 2004 motorcycle trip through Japan, organized and led by Malcolm, who is at left. One of the better pics of The Bishop.
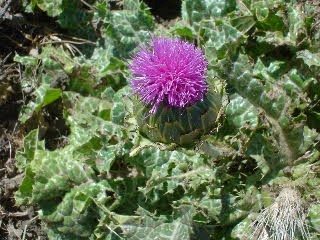
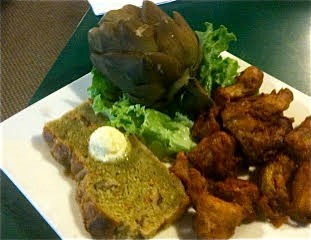
great writing Steve. Thanks. here are some pics of mine from the artichoke capitol of the world castroville ca just east of monterey... artichoke thistle, the giant artichoke and the combo plate at the giant artichoke--artichoke soup, steamed artichoke, deep fried artichoke hearts and artichoke bread.
Brand Man,
Venice, CA